Sunday, 21 November 2010

Missing gooseneck track on mast...UPDATED

When I got my boat and had a good look at the various bits that came with it I never once thought about the gooseneck fitting on the mast.  I was cleaning the mast the other day and thought now how on earth will the boom fit on the mast. 


The boom has a fitting that would seem to go onto a 1" T track.  On the mast there is a section 15" long where a track should have been fitted but no track.  I have scoured the internet and found lots of places that sell track but I did not want a metre of it and it is quite expensive so I set about making my own.

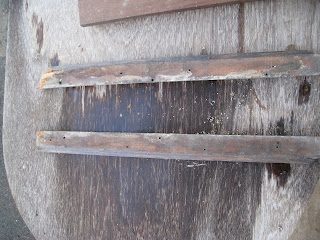
This is the back of the mast where the track should have been.  The three holes in the middle are larger than the top and bottom ones and there did not appear to be any thread on them.  The top and bottom holes looked as though self tapping screws had been used.


I have a piece of aluminium the right thickness and cut a piece 1" wide by 15" long.  I filed the edges and finished them on my belt sander making sure the track fitted nicely through the boom fitting.  I then made a template of the holes on the mast so I could locate them when I drilled through the track. 

Now I was going to cut a similar piece of aluminium about 1/2" wide to go under the forst piece making my T section but then hit on the idea of using some thick aluminium tubing as a spacer where each bolt went through to bolt the track to the mast.  I think this will work quite well but time will tell.  If there is too much pressure on the track then it may bend as it does not have the rigidity of proper T track.


 I have drilled the track and tapped the holes in the mast as seen above, to take 5mm countersunk bolts and I will put a stopper at the bottom to stop the gooseneck slider coming off the track.  I may want to pull the boom off the top of the track so I will leave that.

I will amend this posting once I have fitted on the mast.  Another possible drawback is that the aluminium is not annodised so corrosion may be a problem,  We will just have to see.  At least it didn't cost me anything ;o)

Well, here is the new track on the mast and I think it looks pretty good if I say so myself.  Proof of the pudding will be trying it when the boat is afloat and the main under load.


I also replaced some horrible steel screws holding a nylon cleat on the mast.


Anyone recognise this?


Well it is the handle from the ball head toilet I ripped out of the boat.  I removed all the stainless steel nuts and bolts and anything I thought may be of use.  Low and behold I bent it into a handle shape and ground the end square to fit nicely into my furling gear.  It turns a treat and will be useful until I fit slab reefing to my boat which will be for another year and another mainsail I guess.


Tuesday, 16 November 2010

New storage locker


This is the original small locker on the poirt side roughly amidships.  There is a little door that latches on but the front was delaminated with water ingress and fell off with a little tug.


I have been extending the locker under the port side deck to make it more useful.  I kept the original locker structure but ripped off the front with the small locker door.  I made a cardboard template to match the hull line and then made up the new locker carcass as you can see below.


I stuck this up with duck tape then glassed it in with woven tape and polyester resin.  This is a video of the new front which I made in cardboard first.  Took ages to upload the video, is there a trick to reducing the size to post videos?  The front will be screwed in place and then varnished.  I will fit a door to the rear locker like the original and using the original knob.


The hull - what to do with the topsides???

The hull of my Alacrity has been painted several times over the years with the original gelcoat being a light greeny blue which seems to have been a popular colour at the time she was built.  It looks as though the dark blue paint on the hull now was simply painted on the gelcoat without any primer.  I have had lots of thoughts about the topsides and at first I decided I would just rub it down remove the loose paint and put a coat or two of Pre-Kote on then two coats of Toplac.

I started with the stern and used an orbital sander then cleaned it off.  I then rolled on the primer and tipped it off with a Jenny brush.  This worked well and I filled a few small scratches and imperfections before giving it a second coat.


I decided to carry on with this method for the rest of the hull, starting on the starboard quarter and then moving to the port side forward.  I was by then finding the hull to be in worse condition with lots of loose paint.  I was starting to think I needed to remove all the paint, but how?  I looked at paint stripping machines which the professionals use but they are just too expensive to buy and you cannot rent them, as far as I know.  I read lots about using a chemical paint stripper and that is still a possibility but in the end I decided I really wanted to get the boat in the water and sail.  The boat cost me £200 so it is silly to spend too much on her right now and it is something I can do later.

Picture below shows the state of the paint, layers of it and very rough.


Below is where I have sanded the port bow and primed.


Despite lots of sanding and cleaning off the primer still did not adhere very well in all places.  There are still loose patches where I sanded and primed and bubbles.  There are also some areas where the primer simply has not adhered to the old gelcoat despite sanding to key it in.  I am beginning to think there is moisture in the hull even though the boat sat in a garden for many years. The bubbles appearing do not have moisture in them though.  It could well have had condensation inside which may have had an effect.  I think I need to get a moisture meter to test the hull.

Strangely the below waterline hull condition looks good and no sign of loose paint, thank goodness!

Any words of wisdom welcome or ideas of how to remove all the paint down to gelcoat.  I may then have to epoxy the hull.   

More later when I find the solution...

Saturday, 23 October 2010

Windows


This was just after putting the tent up and before removing the windows and rubbing strake.  Looks quite good from here but looks can be deceiving!


My son Tom putting his Karate skills to good use punching the old windows out.  The rubber was perished and badly fitted and the wondows were cracked and brittle.  Not sur eyet what or how to replace the wondows.  I was quoted for aluminium framed windows with toughened glass or perspex.  The price shocked me, more than £500 for the four!!!  A cheaper option will have to be found but I still want it to look good.


A view looking down as you step into the cabin.  I removed the wooden trim that houses the washboard.  The outer parts were rotten at the bottom.  The inner pieces were fine and just needed sanding.

Notice the wooden step that runs the width of the boat.  This had come away from the fibreglass so I mixed up lots of West Epoxy with some micro-fibres and put it in every crack I could and then clamped it back in place.  It is now bonded in the correct place and just needs cleaning up and a varnish,


This is a picture of the outer trim that was rotten at the bottom.


This is a top view of the old profiles as they fit together.


This is the new outer profile a bit wider than the original but will be more secure.  I routed the rebate and I am using the original inner profile.  I will post pictures when fitted.


View of ventilator on the deck just behind the mast.  The previous fitting was plastic and was cracked and broken.  Not sure if I will put a wooden ring round the inside to finish it off.


This is the mushroom vent I will fit.  I have had it for a long time and it was destined for a previous boat but now will look great on the Alactiry, something to polish!


Transom and through hull fitting

This is the transom taken just after getting the boat home.  Notice the small hole below the outboard tracks.  This was brass and had a pipe leading to the starboard locker.  It did not drain the cockpit but I am guessing it was to drain the locker if gas was stored there.  The locker was not sealed so not sure how efective it would have been.  I have removed the fitting and pipe. 


This is the transom now it has been sanded and painted with grey primer.  I have bought a new through hull fitting which is in place at the bottom of the transom.  I will either connect this to a drain at the aft end of the cockpit or use it as an outlet for a hand operated bilge pump.


View of transom

Thursday, 21 October 2010

Rubbing strake

The next two pics are bits of the rubbing strake I removed.  It was in lots of different pieces and differnt woods and some was rotten and badly fitted or lose.  I decided to remove it, some was bolted on and some screwed through the hull leaving sharp screws sticking out inside.


  Whilst I would have liked a wooden rubbing strake I will replace it with a rubber one as below.


The sample on the left is the likely one I will use as it has a lip to accomodate the step where deck overlaps hull.  Plenty of room for some sealant.  The profile is screwed in place then the tube put in afterwards.  Comes in blue, black or red and different sizes.  The second profile from the same company is intersting as you can sand the surface to look like wood from a distance but it is flat profile where is goes agains the hull and I coul dnot get the white part to fit correctly so no use for the Alacrity unless I put an infill piece on the hull before fitting but that would be too fiddly I think.  If you see my link to Misty the Silhouette Edward has used the white profile and it looks great.


I wanted a woode strake on the stern so I laminated three pieces of teak over a former to get the curve and this will be bolted and screwed onto sealant oncce the hull has been painted.  I coatedthe wood with epoxy and it will be varnished to finish it off.  The picture below is looking across the stern from port side.


Below shows a bolt going right through the new strake with a brass plate.  This is on the centre line.

Mainsheet horse

This is the bronze mainsheet horse.  I have not cleaned it up yet but made some aluminium backing plates the same as for the rudder.


Rudder pintle


This is the bottom rudder pintle.  It is bronze and I just cleaned it up. 


The pintle has four screw holes and a bolt through the hull which goes through a backing timber in the transom. 


I made up some aluminium backing plates to spread the load.


Tuesday, 19 October 2010

The old and new galley sink

This is the old fibreglass sink that was on the starboard side of the boat. It had a hinged lid and very small outlet which drained through the hull. It was a formica top.


You can see the waste outlet after the sink was removed and more blue fleck paint...


This is the new sink surround with the hole for the new sink.


I had a stainless sink that I had on a previous boat, long story, so I used it here. Otherwise I would probably have just used a plastic bowl which could be thrown over board. Not sure what I will cover the wood in to keep moisture out.


There will not be a tap or anything just a plastic jerry can with a tap. Not sure where it will be sighted yet but it looks quite a good spot below but I have yet to see if my kettle will fit under the tap, very important....


Ribs

I closely inspected all the ribs when I bought the boat although I was not too worried if any needed replacing as I have done lots of laminating with wood and epoxy. I was please that they all seemed okay untill I found the forward rib was coming away from the glass fibre holding it in place.


With a bit of a tug the rib came clean away from the hull. There was no limber hole to allow water to run aft so any water would have sat against this rib. I am not sure whether to add any limber holes but I will decide before final fitting.


I had a piece of hardwood already cut in a curve and it was perfect so I just laminated two pieces of oak on top to make up the size.


Once dry I planed the wood down to the correct thickness. I then offered up the old rib and marked it out to cut. First time and the new rib fitted perfectly. Now just to epoxy it in. I might put some glass strips over the top as for the other ribs.


I might need to shave a bit off the top of the rib before fixing to make sure the floor sits level.


Galley Stove that was on boat when I bought it

This is a picture of the stove that was on the boat when I bought her. It was in it's own box with gimbals. It is a Swedish SVEA 153 stove often used by the Swedish Army. I may keep it or sell on eBay as there seems to be a following for Primus parrafin type stoves. Looks nice polished up and burns well.


New locker in progress

New extension to the locker simply added onto the existing locker.


Clamped ready to glass in with 50mm wide glass tape. I will then make a template to fit a new front to the locker going right along the locker.


Portside locker refurb...

The small locker on the port side was only just hanging together. Long periods of damp conditions and the front came away with a slight tug.


The plywood base of the locker was delaminated but I wanted to avoid ripping it all out. I also wanted to extend the locker forward to make more storage. I did this on a Silhouette I had some years ago. I will try to use the little door again though.